Xenex Texturing Guide
Xenex Texturing Style Guide
by Sean Otwell
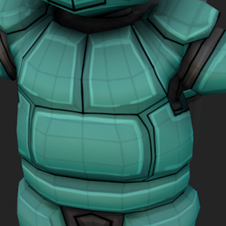
In order to provide efficiency in the texturing and cohesion between character and environmental assets, I’m compiling the following guide to detail texturing process as illustrated by the Decon Class Character Asset.
I should note that there may be a need to add steps or alter colors later as our process evolves, but that the non-destructive and procedural aspects of this process should make any such changes quick and easy.
Step 1: Import and Setup
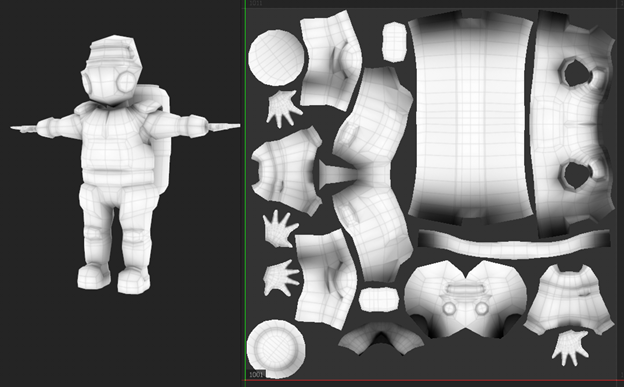
Start a new Substance Painter file with a properly modeled and UV’d asset. Set resolution to 4K. Given the stylized nature of our art style and our overhead isometric camera setup, I suspect we’ll be able to get away with 2K or even 1k in the final game, but we can make this reduction after texturing. For the process itself I’ve found that maxing out the resolution will making the mask and linework painting easier.
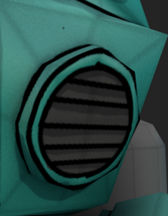
Step2: Baking
Even with the low poly character models I’ve produced so far, baking is still important as the generated masks will be used later in the process. If you’ve produced a high poly version of the asset, obviously use that. Otherwise select Use Low Poly Mesh as High Poly Mesh. Set output to 4096x4096. For this workflow we will need Normal, Ambient Occlusion, Position, and Curvature Maps.
Step 3: Guide Maps
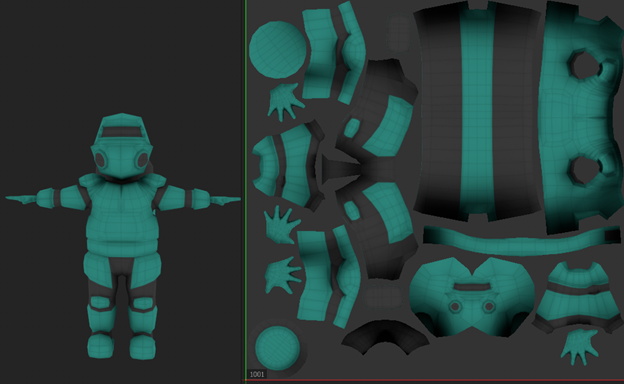
Set the Substance Painter viewport to Base Color mode. Under Texture Set Settings, remove all channels but Base Color and Normal. This will make it hard to read the details on your model, so add a new fill layer and name it AOGuide. Set the blend mode to Multiply and drop the Ambient Occlusion map we generated in the previous step into the color channel on this layer. This will allow you to more easily read the details of your model throughout the texturing process. I also like to add another multiply layer called UVLayout where I insert a UV Layout Map into the color channel as the edges and seems function as useful guides when drawing lineart. Neither of these guide layers will be included in the final exported texture but they are useful during the process.

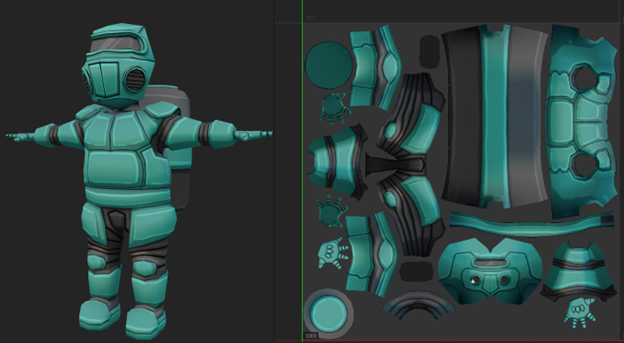
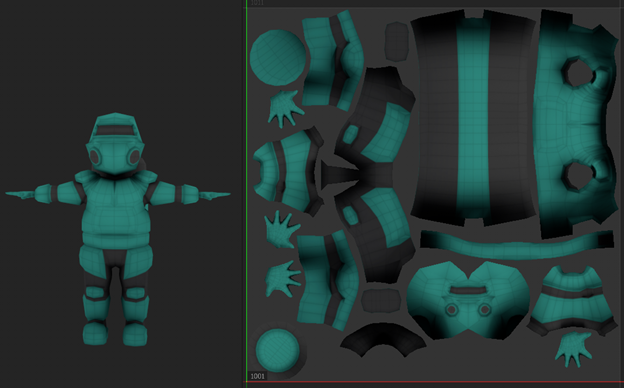
Step 4: Base Colors
Onto base colors. Create a separate fill layer for each of the base colors you’ll be using on your model. Add a black mask to each layer and use it to select the area of effect for each color. I like to put UV seems along material boundaries, so the majority of my masking is done with UV Chunk Fill with some finer details being done with Polygon Fill. If your model is intended to be symmetrical, make sure symmetry is on. Using separate fill layer and black masking will allow us to easily adjust color scheme later.

Step 5: Ambient Occlusion
While the AOGuide layer is just intended to aid in the texturing process, this is the layer that will generate Ambient Occlusion shadows for final export. Create a new fill layer and name it AO. I’m using #4C506C as my shadow color. This non destructive workflow will make it easy to choose a different shadow color later if we want, but I do believe we should pick a shared shadow color across all assets for reasons of stylistic cohesion. Set this layer’s blend mode to multiply. Add a black mask and a generator. Select Ambient Occlusion as generator type and within the generator settings set Global Invert to true.


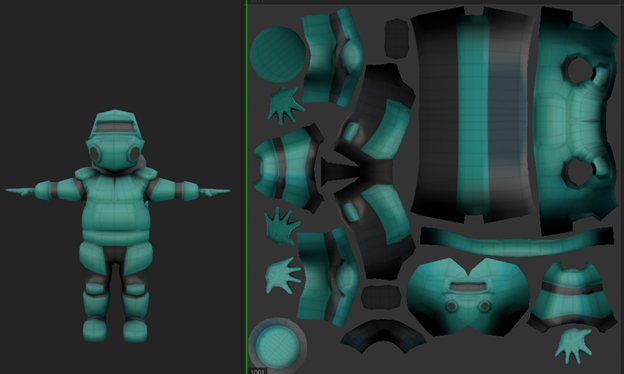
Step 6: Gradient
Add another fill layer with the same shadow blue color. Name the layer Gradient. Set blend mode to multiply and add a black mask and generator. This time select position generator. Set Position Gradient Invert to true. The idea with this layer is to create a subtle degree of color variation across the surfaces of your model. You’ll need to do some manual adjustments to the sliders here as the gradient will be dependent on the size and shape of your model, but generally what we’re aiming for here is subtly darker toward the bottom and subtly lighter toward the top to give a generalized sense of top down lighting. This is a step that will be more apparent on some models than others, so don’t be concerned if the difference is subtle.

Step 7: Baked Lighting
Add another fill layer. Set the base color to pure white, the blend mode to Soft Light, and the Blend Strength to 50%. Add a filter and select the Baked Lighting Stylized filter setting. Adjust as necessary but I’ve found that the default settings have been working pretty well for my needs. I’d like to clarify here than in other blend mode based coloring programs like procreate or photoshop, I’d never recommend using pure white as a light tone as something warmer and more saturated is almost always best, but the blend modes in Substance Painter seem to work differently. Particularly with this art style, pure white seems to work best here.

Step 8: Line Art
Now for the fun part. This is the most time consuming step but, at least for me, is also the most enjoyable. Create a new fill layer with a pure black base color and name it Line Art. Add a black mask and start painting. Make sure to set your brush to maximum hardness for cleaner lines. Symmetry is useful here. Lazy mouse is also helpful for line smoothing (press D while in paint mode to turn it on and off). For perfectly straight lines, hold shift to set start and end points and Ctrl to snap endpoints to 45 Degree angles. Drawing in 3D isn’t always easy. As indicated earlier, I find the UVLayout map to be very helpful during this step as I’ll frequently trace lines directly along polygon edges or use them as reference to judge distances when drawing around curves. There’s generally a fair amount of trial-and-error during this step for me. Go nuts and erase when necessary.
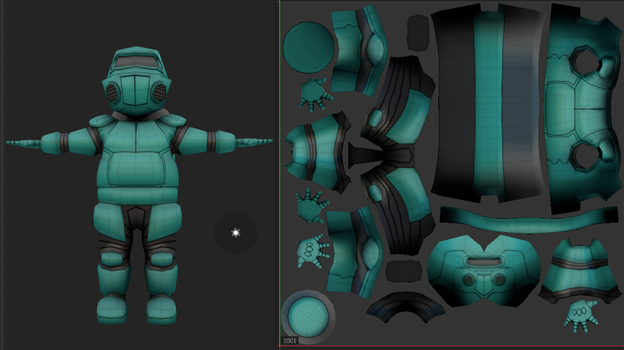
Step 9: Painted Shadows.
My second favorite part after linework. Create a new fill layer utilizing the same shade of shadow blue from earlier. Set blend mode to Multiply and drop blend strength down to 50%. Add a black mask and paint in shadows on your model. Particularly on low poly models like the one I’m demonstrating; this will be where you make up for your low poly count. Some general guidelines are to paint in shadows on any face angled downward or otherwise occluded such as armpits, under the jaw, or between the legs. I also like to paint along any line art line that indicates a crease or crevice to simulate a bevel. I also like to drag this layer down in the hierarchy with the other shadow blue layers, but this doesn’t have a visible effect
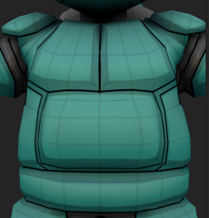
Step 10: Highlights
This is another fun one but also one that’s very easy to overdo. Create another fill layer with a pure white base color and name it Highlight. Set blend ode to Overlay and blend strength to 50%. Add a black mask and paint in highlights where appropriate. In general I’ll paint to big sections on polygons that face directly upward and trace lines along the edges of bevels both simulated and real. In sections intended to simulate extremely shiny materials like glass, I like to add cartoonish specular highlights, but be careful not to overuse this.

Step 11: Export
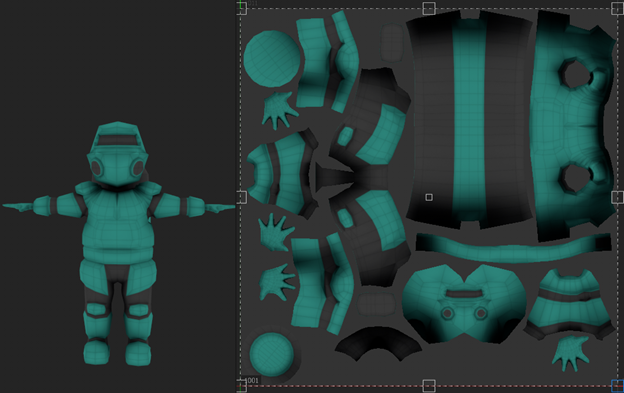
And that’s pretty much the process. From here, deactivate the AOGuide and UVLayout layers and export. You’ll only need the Base Color. If you did a high poly to low poly bake, include the normal map as well. When applying the texture maps in other software, maximize roughness and minimize metallic values. I’ve included my full layer stack for reference.


I'd also like to clarify that the workflow I used is amalgamated from dozens of different youtube tutorials, but owes a more overt debt to two in particular:
Inside Hades - 3D Modeling and Rigging
How to Make Your First Stylized Texture in 5 Minutes using Substance Painter [BEGINNERS TUTORIAL]
Leave a comment
Log in with itch.io to leave a comment.